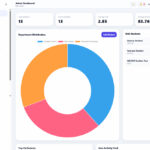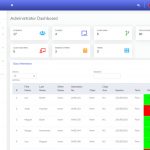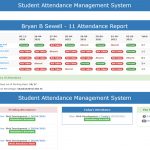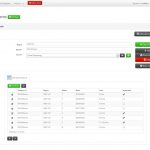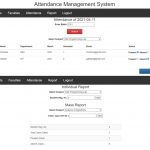
The QR Code Attendance Management System is a web-based attendance application developed with PHP 8.2, MySQL, JavaScript, AdminLTE and browser-based QR scanning. It is designed for schools, companies, offices, clubs, training centres, events and other organizations that need a practical way to register people and record their attendance. The system generates a unique QR code for every registered person, validates attendance against assigned schedules and records Time In and Time Out automatically. Unlike attendance projects built only for students or employees, this Universal Edition uses configurable People, Categories and Departments, which makes it suitable for different types of organizations without changing the source code.
Quick Project Information
| Project Name | QR Code Attendance Management System |
| Edition | Universal |
| Project type | Web Application |
| Programming language | PHP 8.2 or newer |
| Database | MySQL 8.0 or MariaDB 10.5+ |
| Database name | universal_qr_attendance |
| Frontend | HTML5, Bootstrap, JavaScript |
| Admin template | AdminLTE 3.2 |
| User roles | Super Admin, Admin, Staff/Operator |
| Attendee model | People with configurable categories |
| Main feature | QR-based Time In and Time Out |
| Public scanner | Separate self-service attendance kiosk |
| Last tested/reviewed | 17 August 2026 |
| License/use | Educational and personal project use |
| Download format | ZIP |
| SQL file included | Yes |
| Installation method | Web installer or manual SQL import |
| Local server support | XAMPP-compatible setup |
| Reporting formats | PDF, XLSX, CSV and Print |
About the QR Code Attendance Management System in PHP MySQL
Traditional attendance recording often relies on paper registers, spreadsheets or manual data entry. These methods can work for a small group, but they become difficult to manage when an organisation needs accurate arrival times, departure times, late records, attendance summaries and historical reports. This QR Code Attendance Management System replaces that repetitive process with a central web application. Each registered person receives a unique Person ID and QR code. The QR code can be printed on an ID card, downloaded as an image or displayed on a mobile device. When it is scanned, the system checks the person, QR validity, assigned schedule, active attendance day, allowed scan window and existing attendance record before saving the result.
This QR Code Attendance Management System in PHP MySQL project is intended for: Schools and colleges, Offices and private companies, Training centres, Clubs and membership organisations, Volunteer groups, Conferences and seminars, Temporary events, Mixed organisations with several attendee types.
Instead of storing separate student, employee, visitor and volunteer records, the system stores everyone in a single people table. A person is then classified using a configurable category such as Student, Employee, Faculty, Visitor, Contractor, Volunteer, Member, or Guest. This design makes the project more flexible than a basic student attendance system. An administrator can create new categories and departments without editing PHP files or creating additional database tables.
The application also goes beyond a normal CRUD project. It includes schedule-based validation, QR token history, duplicate-scan prevention, automatic Time In and Time Out, attendance correction logs, role permissions, dashboard analytics, reporting, exports, notifications, holidays, announcements, database backup and a separate public attendance kiosk.
QR Code Attendance Management System PHP MySQL Project Demonstration
The following project demonstration shows the QR Code Attendance Management System in PHP and MySQL in actual use. The video covers the administration dashboard, People registration, QR code generation, attendance schedules, QR scanning, the public attendance kiosk, Time In and Time Out processing, attendance records and reporting features. Watch the complete demonstration below to understand how the system works before downloading and installing the source code.
Project Objectives
The main objectives of the QR Code Attendance Management System in PHP MySQL are:
- To replace manual attendance registers: The system provides a digital method for recording attendance instead of relying on paper sheets or manually maintained spreadsheets.
- To reduce attendance-entry time: A QR code can be scanned within seconds, allowing a large number of people to record attendance through a shared kiosk.
- To improve attendance accuracy: The system records the attendance date and time directly from the server and reduces typing mistakes associated with manual entry.
- To support different organisations: Configurable categories and departments allow the same project to be used in a school, company, organisation, seminar or event.
- To automate attendance status calculation: The system compares the recorded Time In with the assigned attendance schedule and late threshold to determine whether a person is Present or Late.
- To prevent repeated attendance records: QR validation and daily attendance checks prevent the same person from creating several Time In records for the same schedule and date.
- To provide controlled access: Role-based permissions separate system configuration, administration and daily attendance operations.
- To provide self-service attendance: The public kiosk allows people to scan their own QR codes without being given access to the administration dashboard.
- To improve reporting: Administrators can filter attendance by date, person, category, department and status before exporting the information.
- To maintain an audit trail: Important actions such as logins, QR generation, attendance corrections, report generation, backup and restore operations are recorded in the activity logs.
- To support project study and documentation: The project demonstrates practical PHP development concepts including authentication, database relationships, QR integration, role permissions, validation, reporting and modular application structure.
How the Whole System Works?
1. System installation
The project is copied to the web-server directory and its Composer dependencies are installed. The administrator then opens public/install.php, enters the database details and creates the first Super Administrator account. The installer creates or connects to the universal_qr_attendance database, imports database/schema.sql, inserts the initial roles and settings, and generates the .env configuration file.
2. Administrator login
The Super Administrator signs in using the account created during installation. After a successful login, the system regenerates the session ID and opens the administration dashboard. The dashboard displays attendance statistics, recent records, Time In and Time Out summaries, late counts, announcements and attendance charts.
3. Organisation settings
Before adding people, the Super Administrator can configure: Organisation name, Organisation logo, Timezone, Person ID prefix, Person ID length, Default late threshold, Low-attendance threshold, QR size, QR prefix, Scanner sound, Public kiosk status, Public kiosk title, Scanner location, Optional kiosk access key.
4. Category creation
Categories define what type of person is being registered. The default database includes categories such as: Student, Employee, Faculty, Visitor, Contractor, Volunteer, Member, Guest. Administrators can add more categories without changing the source code.
5. Department or group creation
Departments organise people into smaller units. Some of the examples include: Information Technology, Human Resources, Accounting, Sales, BSIT, BSHM, Committee A, Committee B. Departments can also contain parent groups, allowing an organisation to create a simple hierarchy.
6. Attendance schedule creation
An attendance schedule defines when attendance can be recorded. Here, each schedule can contain: Schedule name, Start time, End time, Late threshold, Allowed scan time before the start, Allowed scan time after the end, Available weekdays, Active or inactive status. Also, schedules can be assigned to a specific person, a department, or a category. When several schedule assignments are available, the system checks them in this order: Person-specific schedule mapping, Schedule selected directly on the person record, Department schedule, Category schedule.
7. Person registration
An administrator registers a person and enters the available information: Full name, Gender, Birthdate, Contact number, Email address, Address, Category, Department or group, Position or role, Photo, Status, Attendance schedule. The system creates a unique Person ID and a cryptographically random QR token.
8. QR code generation
After the person is saved, the system generates a QR image and links it to that person. The QR code can be previewed, downloaded, printed on a QR card, generated in bulk, or regenerated when required. Regenerating the QR code disables the previous token. An old or replaced QR code will no longer be accepted.
9. QR distribution
The organisation provides the QR code to the person. It may be: Printed on an ID card, Printed on a visitor badge, Downloaded as an image, Saved on a mobile phone, or Included on a membership card.
10. Public kiosk setup
The organisation opens the public scanner on a shared phone, tablet, laptop or desktop computer. The default kiosk URL is: http://localhost/universal_qr_attendance/public/kiosk.php
The kiosk displays only the scanner, organisation branding, camera status and attendance confirmation. It does not show the administration sidebar or management pages.
11. QR scanning
The person places their QR card inside the scanner frame. The browser reads the QR value and sends it to the attendance API. The system checks: Whether the QR format is valid, Whether the QR token exists, Whether it is the currently active QR token, Whether the person exists, Whether the person is active, Whether the current date is a holiday, Whether today is enabled in the assigned schedule, Whether the scan is inside the permitted window, Whether Time In already exists, and Whether Time Out already exists.
12. Time In recording
When no attendance record exists for that person, date and schedule, the first accepted scan records Time In. The system then calculates the attendance status. If the scan occurs before or within the allowed late threshold, the status is recorded as Present. If it occurs after the late threshold, it is recorded as Late.
13. Time Out recording
When a Time In record already exists but Time Out is empty, the next accepted scan records Time Out. If both Time In and Time Out already exist, the scanner displays an attendance-completed message instead of creating another record.
14. Attendance confirmation
After an accepted scan, the kiosk displays: Person’s photo, Full name, Person ID, Category, Department, Attendance status, Time In or Time Out, Recorded time, Schedule name, and a Success message. The scanner also provides success or error audio when scanner sounds are enabled.
15. Attendance review and correction
Authorised users can open Attendance Logs to review records. When a genuine mistake occurs, an Administrator can correct the attendance time, status or remarks. The correction is recorded in the activity log.
16. Report generation
Attendance records can be filtered by: Date range, Person, Category, Department, Status, Name, Person ID. Reports can be exported as PDF, Excel XLSX, CSV or a printable browser page.
17. Backup and maintenance
The Super Administrator can create an SQL database backup from System Settings. Backups should be downloaded and stored outside the public website, especially before updates or major data changes.
User Roles and Permissions
The application contains three administrative user roles. Registered People are attendance subjects and do not automatically receive dashboard accounts.
Super Administrator
The Super Administrator has the highest level of access. Typical permissions include viewing the complete dashboard, managing system users, creating Administrator and Staff accounts, managing people, managing categories, managing departments and groups, and managing attendance schedules. The Super Administrator can also generate and regenerate QR codes, operate the QR scanner, add manual attendance, correct attendance records, and view and export reports.
In addition, the Super Administrator can manage holidays and announcements, view notifications and activity logs, update organisation settings, configure the public kiosk, create database backups, download backups, and restore SQL backups.
Administrator
The Administrator manages the organisation’s attendance operations. Typical permissions include viewing the dashboard, registering and updating people, managing categories, managing departments and groups, and managing schedules. The Administrator can also generate and print QR codes, operate the QR scanner, add manual attendance, correct attendance records, view attendance logs, and generate and export reports.
In addition, the Administrator can manage holidays and announcements and view activity logs. System-level functions such as backup, restore, and core application settings remain restricted to the Super Administrator.
Staff / Operator
Staff accounts are intended for daily attendance work. Typical access includes opening the QR scanner, scanning attendance, adding authorised manual attendance, viewing attendance logs, searching and filtering attendance, and viewing reports. Staff users can also read available announcements and notifications and view people, categories, departments, and schedules where required for operations. Staff users cannot manage system users, restore the database, or change restricted system settings.
Registered People
A registered Person is not the same as an administrative user. People do not need a username and password to record attendance. Instead, they use their assigned QR card at the public attendance kiosk. The public kiosk does not provide access to dashboard analytics, people records, reports, user management, system settings, database backups, or manual attendance controls.
Major System Features
Authentication and Account Management
The system provides secure login, password hashing, role-based access control, and session regeneration after login. It also supports forgot-password tokens, password changes, user profiles, active and inactive user status, and login and logout activity history.
Dashboard
The dashboard displays the total number of registered people, today’s present count, today’s absent records, late count, Time In summary, Time Out summary, recent attendance, a seven-day attendance graph, and system announcements.
People Management
People management includes a unique Person ID, full name, photo upload, gender, birthdate, contact number, email, address, category, department or group, optional position or role, attendance schedule, and active or inactive status. The system also provides search and filtering and a paginated people list.
Category Management
Category management allows users to add and edit categories, activate or deactivate categories, and delete unused categories. The system also supports default universal categories, category-based schedule assignment, and category attendance reports.
Department and Group Management
Department and group management includes adding departments or groups, department codes, parent and child grouping, editing departments, and activating or deactivating departments. The system also supports department-based schedule assignment and department attendance reports.
QR Code Management
QR code management includes secure random QR tokens, QR image generation, QR preview, QR download, printable QR cards, and bulk QR card printing. The system can also generate missing QR images, regenerate QR codes, maintain QR version history, invalidate replaced QR codes, and validate QR codes.
Public Attendance Kiosk
The public attendance kiosk provides a separate public scanner page that does not require administrator login. It uses a responsive phone, tablet, and desktop layout, with automatic camera startup and a rear-camera preference on mobile. The kiosk includes an adaptive QR scanning frame, automatic Time In and Time Out, person photo confirmation, attendance status confirmation, success and error sounds, duplicate-read suppression, request throttling, and an optional kiosk access key. It also supports a configurable kiosk title, scanner location, and confirmation duration.
Attendance Management
Attendance management supports QR attendance, manual attendance, Time In, Time Out, optional Break Out, and optional Break In. It also includes duplicate-attendance prevention, attendance correction, remarks, scanner location, device information, and attendance statuses such as Present, Late, Absent, On Leave, Holiday, and Half-Day.
Schedule Management
Schedule management includes the schedule name, start time, end time, late threshold, allowed early-scan window, allowed late-scan window, and available weekdays. Schedules can be assigned to people, categories, and departments and can be set as active or inactive.
Attendance Logs
Attendance logs display the Person ID, QR-related identity, full name, category, department, schedule, date, Time In, Time Out, Break Out, Break In, status, remarks, and scanner location.
Reports and Exports
The system provides daily, weekly, monthly, and yearly attendance reports, as well as individual, department, category, late, and absent reports. Reports can be exported as PDF, Excel XLSX, or CSV files and can also be viewed in a print-friendly format. Report-generation activity is also recorded in an activity log.
Notifications and Audit Logs
The system provides in-app notifications, attendance alerts, low-attendance alerts, read and unread notification states, a mark-all-as-read option, and system announcements. It also records user action history, login history, QR-generation history, attendance-correction history, report-generation history, and backup and restore history.
System Settings
System settings include the organization name, organisation logo, timezone, Person ID prefix, Person ID length, attendance rules, default late threshold, low-attendance threshold, QR size, QR prefix, scanner sound, kiosk status, kiosk title, kiosk location, and kiosk access key. The system also supports database backup, backup download, and SQL restore.
Technologies Used
| Technology | Purpose | Version or requirement |
| PHP | Backend logic, routing, validation and services | 8.2 or newer |
| MySQL | Main relational database | 8.0+ |
| MariaDB | Alternative compatible database | 10.5+ |
| PDO MySQL | Secure database communication | PHP extension |
| HTML5 | Page and form structure | HTML5 |
| CSS | Responsive styling and kiosk layout | CSS3 |
| Bootstrap | Grid, forms, tables, buttons and responsive components | Bootstrap 4.x/4.6-compatible |
| AdminLTE | Administration dashboard interface | 3.2 |
| JavaScript | Scanner interaction and dynamic UI behaviour | ES6 |
| html5-qrcode | Browser and mobile camera QR scanning | 2.3.8 |
| Endroid QR Code | Server-side QR image generation | 6.x |
| Chart.js | Dashboard attendance charts | CDN build |
| Dompdf | PDF report generation | 3.1-compatible |
| PhpSpreadsheet | Excel XLSX export | 4.x or 5.x |
| SweetAlert2 | Confirmation and alert dialogs | CDN build |
| Composer | PHP dependency management | Composer 2 |
| Apache | Local web server | 2.4 recommended |
| XAMPP | Local PHP, Apache and database environment | Compatible release with PHP 8.2+ |
The project directly uses these technologies for attendance processing, QR generation, exports, reporting or interface behaviour. Libraries included only as dependencies of another package are not listed separately.
System Architecture and Module Structure
This QR Code Attendance Management System in PHP MySQL project follows a lightweight modular PHP structure rather than placing every operation in a single PHP file. The application is organised into separate areas for controllers, core functionality, services, views, configuration, database resources, public files, scripts and storage.
Authentication Module
The authentication module manages all user authentication functions. It handles login and logout, password verification, forgot-password tokens, password resets and user session creation. It also manages role checking, profile updates and password changes.
User and Role Module
The User and Role module manages the three administrative roles and their respective access levels. The roles table stores the role definitions, while the users table stores the administrative accounts associated with those roles.
People Management Module
The People module stores every attendee using a universal structure. It manages personal details, category, department, schedule, photo, status and Person ID, providing a central location for attendee information.
QR Generation Module
The QR Generation module is responsible for creating secure random tokens and generating QR images. It also stores different QR versions and invalidates replaced QR codes to ensure that outdated codes cannot continue to be used.
Public Scanning Module
The Public Scanning module provides a separate scanner page for self-service attendance. It communicates with a restricted attendance API and operates independently from the administration layout.
Attendance Processing Module
The Attendance Processing module handles the main attendance business rules. It validates QR codes and people, checks holidays and resolves the applicable schedule. It also verifies active days and scan windows, calculates late status, records Time In and Time Out, and prevents duplicate attendance records.
Reporting Module
The Reporting module retrieves filtered attendance information and generates reports in several formats. These include CSV files, XLSX spreadsheets, PDF reports and printable pages.
Notification Module
The Notification module provides in-app messages and attendance alerts. It also manages whether notifications have been read or remain unread.
Activity Log Module
The Activity Log module records important system actions for later review. This provides a history of relevant activities performed within the application.
System Settings Module
System settings are stored in the database rather than being hardcoded throughout the application. This allows organisation details, attendance rules and kiosk behaviour to be updated directly through the dashboard without requiring changes throughout the application code.
Backup and Restore Module
The Backup and Restore module provides database backup and restoration functionality. The backup service creates SQL backups and supports controlled database restoration for the Super Administrator.
Important Database Relationships
The database uses several relationships to keep information organised and maintain consistent links between the different parts of the system. One role can have many users, while one category can contain many people. Similarly, one department can contain many people, and a department may also have a parent department to support hierarchical department structures. A single schedule can be assigned to many categories, many departments and many individual people. This allows schedules to be applied at different levels depending on the organisation’s requirements.
Each person can have many historical QR-code records, allowing previous QR codes to be retained for reference while newer codes are issued. A person can also have many attendance records across different dates. Likewise, one schedule can be linked to many attendance records. The database also tracks which users create or update records. One user may create or update several records throughout the system. Notifications can be linked to a specific user or made available generally, depending on their purpose. Activity logs provide a record of important system actions. Each log may reference the user who performed the action, the action itself, the related entity and the corresponding record ID.
Attendance Uniqueness
The attendance table uses a unique rule based on the person, attendance date and schedule. This ensures that the same person cannot have several attendance rows created for the same date and schedule. This uniqueness rule helps prevent duplicate attendance records and keeps attendance data consistent across the system.
System Requirements
Minimum Supported Server Requirements
- PHP 8.2
- MySQL 8.0 or MariaDB 10.5
- Apache or Nginx
- Composer 2
- JavaScript-enabled browser
- PHP PDO extension
- PHP PDO MySQL extension
- PHP GD extension
- PHP Mbstring extension
- PHP ZIP extension
- PHP DOM extension
- PHP Fileinfo extension
- PHP JSON support
- Writable upload and storage directories
Recommended Environment
- A current XAMPP release containing PHP 8.2 or newer
- Apache 2.4
- MySQL 8.0
- Composer 2
- HTTPS for hosted use
- Google Chrome or Microsoft Edge for kiosk operation
- A tablet, laptop or desktop with a working camera
- A rear-facing camera when using a mobile device
- A restricted MySQL database user for production
- Regular off-server database backups
Personally Tested and Reviewed
We as the owner of this QR Code Attendance Management System in PHP MySQL project can confirm that the application was installed and working in a local environment. This Version package was also reviewed on 17 August 2026 for PHP syntax, route/controller consistency, kiosk JavaScript syntax and ZIP integrity. The exact local PHP, MySQL, XAMPP and browser patch versions used by the project owner were not recorded. For that reason, this documentation does not claim that every PHP 8.x release, hosting provider or browser has been personally tested.
Browser Requirements
The administration panel works in a modern JavaScript-enabled browser. The QR scanner additionally requires:
- Browser camera support
- Camera permission
- HTTPS when deployed online
localhostaccess during local development
Chrome or Edge is recommended for initial testing. Camera behaviour should be tested on the exact phone, tablet or kiosk device that will be used.
Installation Guide
The recommended installation uses the included web installer.
Step 1: Download and Extract the Project
Download the complete Version ZIP package.
Extract it so the final folder name is:
universal_qr_attendanceAvoid creating an unnecessary nested folder such as:
universal_qr_attendance/universal_qr_attendance/Step 2: Move the Project to the XAMPP Web Directory
Move the extracted folder to:
C:\xampp\htdocs\universal_qr_attendanceThe expected project structure should look similar to:
C:\xampp\htdocs\universal_qr_attendance\app
C:\xampp\htdocs\universal_qr_attendance\config
C:\xampp\htdocs\universal_qr_attendance\database
C:\xampp\htdocs\universal_qr_attendance\public
C:\xampp\htdocs\universal_qr_attendance\composer.json
Step 3: Install Composer Dependencies
Open Command Prompt or PowerShell inside the project folder.
Run:
cd C:\xampp\htdocs\universal_qr_attendance
composer install --no-dev --optimize-autoloader
This installs the libraries used for:
- QR image generation
- PDF reports
- Excel XLSX reports
- Composer autoloading
After installation, the project should contain:
C:\xampp\htdocs\universal_qr_attendance\vendorStep 4: Enable the Required PHP Extensions
Open:
C:\xampp\php\php.iniConfirm that the required extensions are enabled.
Remove the leading semicolon where necessary:
extension=gd
extension=mbstring
extension=mysqli
extension=pdo_mysql
extension=zip
DOM and Fileinfo are normally enabled by default in XAMPP.
Save the file and restart Apache.
The project also includes a requirements checker:
php scripts/check_requirements.phpRun it from:
C:\xampp\htdocs\universal_qr_attendanceStep 5: Start Apache and MySQL
Open the XAMPP Control Panel. Start: Apache, MySQL. Both services should show a running status.
Step 6: Open the Web Installer
Open the following URL:
http://localhost/universal_qr_attendance/public/install.phpStep 7: Enter the Database Details
Use details suitable for your XAMPP installation. Typical local values are:
| Field | Local value |
| Database host | 127.0.0.1 |
| Database port | 3306 |
| Database name | universal_qr_attendance |
| Database user | root |
| Database password | <Leave blank for a default XAMPP installation> |
| Application URL | http://localhost/universal_qr_attendance/public |
The installer attempts to create the database when the MySQL user has permission. It then imports:
database/schema.sqlStep 8: Create the First Super Administrator
The installer asks for: Administrator full name, Username, Email, Password. The password must contain at least eight characters. The system hashes the password before storing it.
Step 9: Complete the Installation
The installer creates or selects universal_qr_attendance, Imports database/schema.sql , Adds the default roles, Adds the default categories, Adds the default settings, Creates the first Super Administrator, Creates the .env file
Step 10: Open the Login Page
After installation, please open:
http://localhost/universal_qr_attendance/public/The direct login route is:
http://localhost/universal_qr_attendance/public/index.php?route=loginStep 11: Sign In
Use the username or email and password entered during installation.
Demo Credentials
This project does not contain a fixed public demo username or password. The first login account is created during installation. Example only:
Username: admin
Password: << the password you entered in install.php >>
Step 12: Open the Public Kiosk
The default public kiosk URL is:
http://localhost/universal_qr_attendance/public/kiosk.phpThe exact kiosk URL is also displayed under:
System Settings → Public Attendance KioskStep 13: Remove the Installer for Production
After installation, delete or rename:
public/install.phpThis is especially important when the project is deployed online.
Manual Database Installation
Use this method when the hosting account cannot create databases automatically.
1. Create the database
Open phpMyAdmin and create:
universal_qr_attendanceUse UTF-8 MB4 where available.
2. Import the SQL file
Select the database and import:
database/schema.sql3. Create the environment file
Copy:
.env.exampleRename the copy to:
.env4. Configure the database connection
Edit .env:
APP_NAME="Universal QR Attendance"
APP_URL="http://localhost/universal_qr_attendance/public"
APP_ENV="local"
APP_DEBUG=true
APP_KEY="replace-this-with-a-long-random-secret"

DB_HOST="127.0.0.1"
DB_PORT="3306"
DB_NAME="universal_qr_attendance"
DB_USER="root"
DB_PASS=""
5. Create the first administrator
The safest option is to use public/install.php after manually creating the empty database. Creating an administrator directly with SQL requires a valid PHP password_hash() value. Do not insert a plain-text password.
6. Install Composer dependencies
Run:
composer install --no-dev --optimize-autoloader7. Open the project
http://localhost/universal_qr_attendance/public/How to Use the System
After the project has been installed, use it in the following order.
1. Sign in as Super Administrator
Use the account created during installation.
2. Configure organisation settings
Open System Settings and enter:
- Organisation name
- Logo
- Timezone
- Person ID rules
- Attendance rules
- QR settings
- Kiosk settings
3. Create additional users
Create Administrator or Staff / Operator accounts where required. Do not share one administrator account between several staff members if an audit trail is important.
4. Review or create categories
Open Categories and add the attendee types used by the organisation. Examples include Student, Employee, Visitor and Volunteer.
5. Create departments or groups
Add the organisation’s departments, classes, courses, committees or teams.
6. Create attendance schedules
Set the start time, end time, late threshold, scan window and available days. Assign the schedule to the relevant people, category or department.
7. Register people
Open People and add each attendee. Select their category, department, status and schedule.
8. Generate and distribute QR codes
Download or print each person’s QR code. Bulk card printing can be used when many people have been registered.
9. Configure the public kiosk
Open System Settings and enable the Public Attendance Kiosk. Set its location and optional access key.
10. Open the scanner device
On the shared device, open:
http://localhost/universal_qr_attendance/public/kiosk.phpAllow camera permission.
11. Record Time In
The person scans their QR code when arriving. The system records Time In and determines whether the attendance is Present or Late.
12. Record Time Out
The person scans the same QR code again when leaving. The system records Time Out.
13. Review attendance logs
Open Attendance Logs to verify the recorded information. Use filters to find a specific person, date, department or status.
14. Correct genuine mistakes
Use attendance correction when an authorised change is required. Add remarks explaining the correction.
15. Generate reports
Open Reports and select the report type, date range and filters. Export the result as PDF, XLSX, CSV or print.
16. Review notifications and activity logs
Check attendance alerts, unread notifications, and recorded user actions.
17. Create regular backups
Open System Settings and create an SQL backup. Download the backup and keep a copy outside the project folder.
Common Errors and Solutions
Possible causes: MySQL is not running, the database username or password is incorrect, the database name is wrong, the host or port is wrong, or the PDO MySQL extension is missing.
Configuration file:
.envSolution: Start MySQL in XAMPP and confirm:
DB_HOST="127.0.0.1"
DB_PORT="3306"
DB_NAME="universal_qr_attendance"
DB_USER="root"
DB_PASS=""
Also confirm that extension=pdo_mysql is enabled in php.ini.
Cause: Composer is not installed or is not available in the Windows PATH.
Solution: Install Composer 2 and reopen Command Prompt.
Test it using:
composer --versionThen run:
composer install --no-dev --optimize-autoloaderTypical error:
Failed opening required vendor/autoload.phpCause: Composer dependencies were not installed.
Solution: Open the project folder and run:
composer install --no-dev --optimize-autoloaderCause: The MySQL account does not have permission to create databases.
Solution: Create universal_qr_attendance manually in phpMyAdmin and run the installer again using the existing database.
Alternatively, import:
database/schema.sqlPossible causes: The wrong database is selected, the SQL file was imported twice, existing tables conflict, the server uses an unsupported database version, or phpMyAdmin upload limits are too low.
Solution: Use an empty universal_qr_attendance database and import:
database/schema.sqlThe project targets MySQL 8.0+ or MariaDB 10.5+.
Possible causes: Camera permission was denied, the site is running over plain HTTP on a remote domain, another application is using the camera, the browser does not support camera access, or the page is inside a restricted embedded frame.
Solution: Allow camera permission in the browser, use localhost during development, use HTTPS when deployed online, close other camera applications, test with Chrome or Edge, and reload the kiosk page.
Cause: Modern browsers normally require a secure context for camera access.
Solution: Install an SSL certificate and open the site through:
https://your-domain.example/Do not rely on plain HTTP for an online kiosk.
Possible causes: The GD extension is disabled, Composer dependencies are missing, or the QR upload directory is not writable.
Solution: Enable:
extension=gdRun Composer installation and confirm the QR storage directory has write permission.
Possible causes: The code belongs to another system, the QR prefix is incorrect, the person was deleted or made inactive, the QR was regenerated, or an old printed card is being used.
Solution: Open the person’s QR page and verify the active QR code.
Download or print the latest version.
Cause: The camera may read the same QR code several times while it remains inside the frame.
Solution: Remove the QR card after a successful scan.
The kiosk intentionally suppresses immediate repeated reads to prevent one scan from recording both Time In and Time Out.
Cause: Both Time In and Time Out have already been recorded for that person, date and schedule.
Solution: Review the Attendance Logs.
Use attendance correction only when the existing record is genuinely incorrect.
Cause: The current time is outside the schedule’s early or late scan allowance.
Solution: Review:
- Start time
- End time
- Scan-before minutes
- Scan-after minutes
- Available weekdays
- Server timezone
Possible causes: The application timezone is incorrect, the Windows/server time is incorrect, there is a PHP timezone difference, or there is a database server time difference.
Solution: Open System Settings and select the correct timezone. Also verify the operating system clock and server timezone.
Possible causes: The Dompdf dependency is missing, Composer was not run, required PHP extensions are unavailable, or large reports exceed server memory limits.
Solution: Run Composer installation and confirm DOM, Mbstring and related PHP extensions are enabled. Try a smaller report date range to identify memory-related problems.
Possible causes: PhpSpreadsheet is missing, the ZIP extension is disabled, or Composer dependencies were not installed.
Solution: Enable:
extension=zipThen run:
composer install --no-dev --optimize-autoloaderPossible causes: The upload directory is not writable, the file exceeds the PHP upload limit, the file type is unsupported, or the Fileinfo extension is disabled.
Solution: Check write permission for:
public/uploadsAlso review:
upload_max_filesize
post_max_size
inside php.ini.
Possible causes: A required extension is missing, the PHP version is below 8.2, Composer dependencies are missing, or a fatal PHP error is hidden in production mode.
Development-only troubleshooting: Temporarily edit .env:
APP_ENV="local"
APP_DEBUG=true
Do not leave debug mode enabled on a public website. Check the PHP or Apache error log for the real message.
Possible causes: Apache rewrite is disabled, .htaccess is ignored, the project URL is incorrect, or the web root is not pointing to public.
Solution: Enable Apache mod_rewrite and allow .htaccess overrides.
For simple local access, use the direct route format:
http://localhost/universal_qr_attendance/public/index.php?route=loginCause: The project uses PHP’s configured mail() transport. A default XAMPP installation usually does not send internet email without additional mail configuration.
Solution: Configure an SMTP or mail service for production.
In a local development environment, reset links may also be written to:
storage/logs/password-reset.logPossible causes: The backup directory is not writable, database credentials are incorrect, PHP execution limits are too low, or the database is large.
Solution: Check:
public/backupsMake sure the server can write to it and verify the database connection. For large production databases, use a server-level backup process instead of relying only on the browser.
Security and Limitations
This project includes several security measures, but it should still be reviewed before being used by a real organisation.
Existing Security Measures
The application includes:
- PDO prepared statements
- Native prepared-query mode
- Password hashing
- Password verification
- Session ID regeneration
- CSRF protection
- Server-side role checks
- Output escaping
- Upload MIME validation
- Random upload filenames
- Hashed password-reset tokens
- Expiring reset links
- Random QR tokens
- QR version history
- Invalidated replaced QR codes
- Public-kiosk access key option
- Kiosk request throttling
- Repeated-QR suppression
- Activity logging
- Backup and restore logging
Educational and Production Use
The project is suitable for:
- Learning PHP and MySQL
- Academic demonstrations
- Portfolio projects
- Attendance-system prototypes
- Small controlled internal deployments
It should not be described as automatically production-ready simply because it runs successfully on XAMPP. Before production use, an experienced developer should review:
- Server configuration
- Access permissions
- HTTPS
- Database security
- Privacy obligations
- Backup strategy
- Email delivery
- Logging
- Hosting restrictions
- Organisation-specific attendance rules
Default Credentials
There are no fixed default credentials in the package. The first Super Administrator is created through the installer. This is safer than including the same public password in every downloaded copy.
Camera Permission
The public kiosk requires browser camera permission. Camera access may fail when:
- HTTPS is not enabled
- Permission is denied
- The browser does not support the required APIs
- The device camera is already in use
Shared QR-Code Risk
A QR code proves that the code was scanned. It does not prove that the registered person was physically holding it. A person could photograph, copy or share their QR code with someone else. Organisations requiring stronger identity confirmation should consider additional controls such as:
- Staff supervision
- Photo confirmation
- Rotating QR codes
- Device approval
- Geofencing
- Selfie verification
- NFC cards
- Biometric hardware
These controls are not included in this version.
Public Kiosk Access
The kiosk can use an optional access key, but a URL key alone is not a replacement for full device authentication. The kiosk should be opened on a controlled device and should not be published unnecessarily.
Rate Limiting
The kiosk includes request throttling and repeated-code suppression. The current protection is application/session based. It is not a distributed rate-limiting system for multiple application servers. A production deployment may require web-server, firewall or reverse-proxy rate limiting.
HTTPS Requirement
HTTPS is strongly recommended for the complete application and normally required for browser camera access outside localhost.
Data Privacy
The system can store:
- Names
- Photographs
- Email addresses
- Phone numbers
- Birthdates
- Addresses
- Attendance history
- Device information
- Scanner location
The organisation using the project is responsible for obtaining consent, limiting access, defining retention periods and complying with local privacy laws. Only necessary personal information should be collected.
Backup Security
Backups may contain the complete attendance database. Backup files should not remain publicly accessible. For production use:
- Protect or relocate
public/backups - Download backups regularly
- Encrypt off-server copies
- Restrict restore permission
- Test restoration procedures
Email Limitation
Forgot-password delivery uses PHP’s configured mail transport. SMTP configuration is not included as a full dashboard module.
Internet/CDN Limitation
AdminLTE, Bootstrap-related assets, Chart.js, SweetAlert2 and html5-qrcode are loaded through CDN links. An offline intranet deployment should download these assets and serve them locally.
No Individual Person Portal
Registered People do not receive personal login accounts in this version. They can scan attendance through the public kiosk, but they cannot sign in to view their personal attendance history.
No Automatic Background Absence Job
The system supports Absent status and absent reports, but Version 1.1.1 does not include a server scheduler that automatically marks every unscanned person absent at the end of the day. Absent records can be managed according to the organisation’s attendance process.
Frequently Asked Questions
Yes. The system does not hardcode attendees as students or employees. Every attendee is stored as a Person and assigned to a configurable category. This means the same installation can manage students, employees, faculty members, visitors, contractors, volunteers, members and guests.
The scanner is designed to work with modern mobile browsers that support camera access. The responsive kiosk includes a mobile layout and prefers the rear-facing camera. Chrome or Edge is recommended for initial testing. The website must use HTTPS when it is deployed online. Localhost can normally access the camera without a public SSL certificate. Because camera support varies between browsers and devices, test the actual phone or tablet before using it as a permanent kiosk.
Yes. People scan their own QR codes using the separate public kiosk:
http://localhost/universal_qr_attendance/public/kiosk.phpThey do not need an Administrator or Staff account. The kiosk only displays the camera scanner and attendance result. It does not provide access to the administration dashboard.
Yes. The first accepted scan records Time In. The next accepted scan records Time Out. When both values already exist, another automatic scan is rejected as completed attendance. The authenticated scanner also supports optional Break Out and Break In actions.
The assigned schedule contains:
- Start time
- Late-threshold minutes
The attendance service compares the Time In with the schedule start plus the threshold. A scan after that calculated time is marked Late.
Yes. The database prevents duplicate attendance rows for the same person, date and schedule.
The scanner also checks whether Time In and Time Out already exist. The public kiosk suppresses immediate repeated reads of the same QR code so one card held in front of the camera does not instantly create both actions.
The minimum supported version is:
PHP 8.2The Composer configuration also requires PHP 8.2 or newer.
Yes. The complete SQL schema is included at:
database/schema.sqlThe default database name is:
universal_qr_attendanceThe web installer can create and import the database automatically when the database user has sufficient permission.
No fixed demo credentials are included. The installer simply asks you to create the first Super Administrator account. Use the username or email and password entered during installation.
No. When the QR code is regenerated, the previous active QR token is disabled. The person must use the newly generated QR card.
The system supports Absent records and absent reports. However, this current version of the project does not include a scheduled background task that automatically marks every person absent after a schedule ends. The organisation should manage absent status according to its own attendance process.
Yes. It covers several practical development areas:
- PHP authentication
- MySQL database design
- Role permissions
- QR generation
- Browser camera scanning
- Business-rule validation
- Reporting
- File exports
- System settings
- Audit logs
- Backup and restore
The project can be studied, demonstrated and extended as an attendance-management case study. Before using it with real personal data, review the security, privacy and deployment limitations described above.
Download QR Code Attendance Management System in PHP MySQL with Source Code
You can download the complete QR Code Attendance Management System in PHP and MySQL using the button below. The download package includes the complete PHP source code, MySQL database file, AdminLTE interface, QR attendance scanner, public attendance kiosk and the project files required for local installation.
Before installing the project, check the System Requirements and Installation Guide provided above. The project is supplied as a ZIP file and can be installed locally using XAMPP or on a compatible PHP and MySQL web server.
Note: This project is provided for educational, learning and development purposes. Review the source code, security settings and server configuration carefully before using it with real organisational or personal data.
Looking for more PHP projects?
Browse more PHP MySQL projects with source code for programming practice, academic projects and web development examples.